PS也能制作动画吗?是的,可以今天小编就教大家用PHOTOSHOP CC制作一个萦绕在美女周围的光线动画。

方法如下:
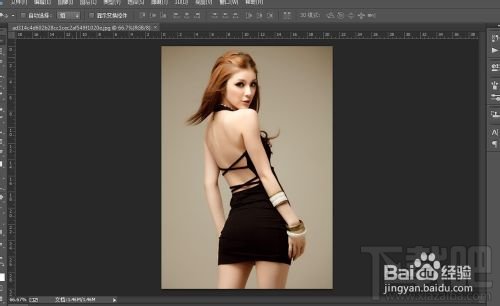
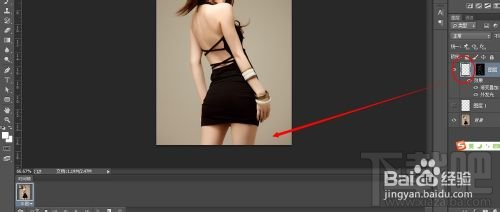
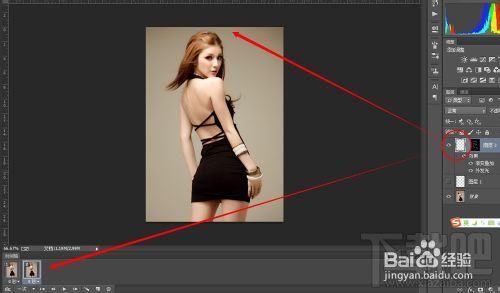
1、首先打开PHOTOSHOP CC软件,单击菜单【文件】-【打开】命令,打开一张美女图片。
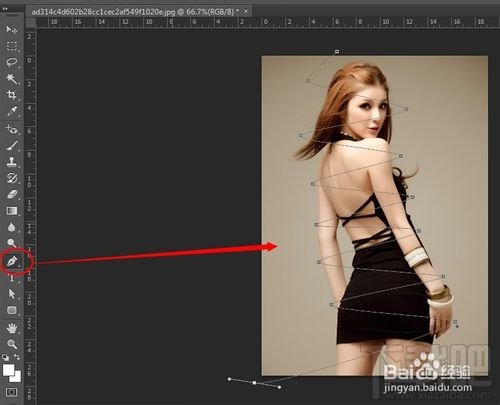
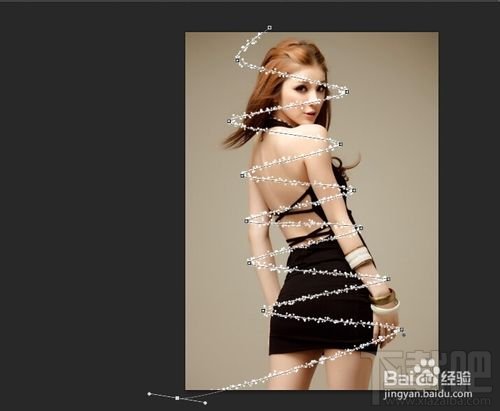
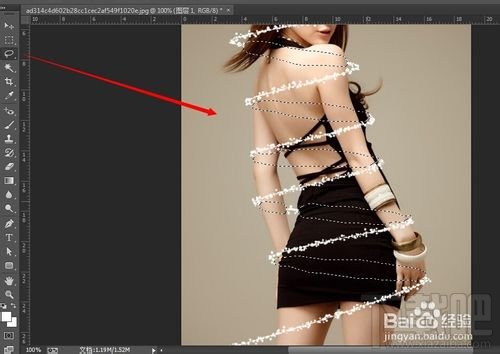
2、点击左侧工具栏中的钢笔工具,在图片上画出一条螺旋的曲线,慢慢调整好后如图。
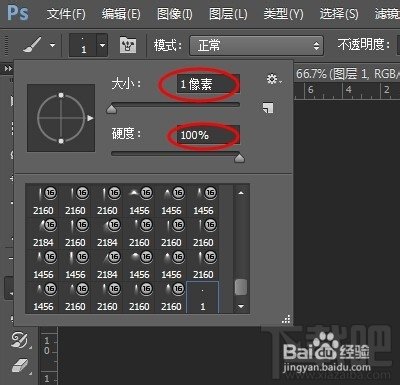
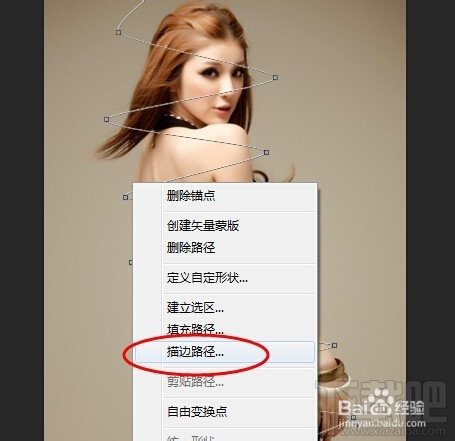
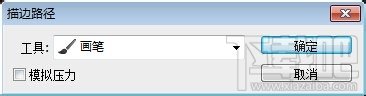
3、点击图层面板的新建按钮,新建一个图层,选择画笔工具,笔尖选择最小,点击路径选择工具,右键点击路径,执行描边路径。
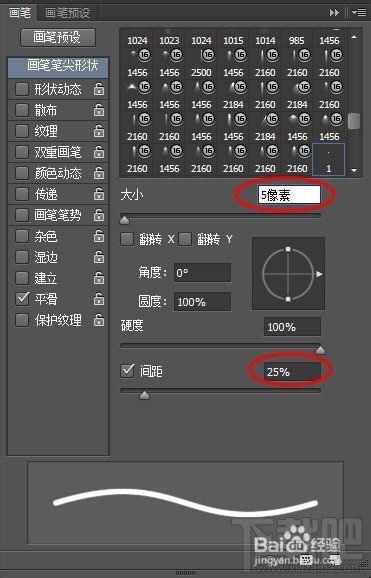
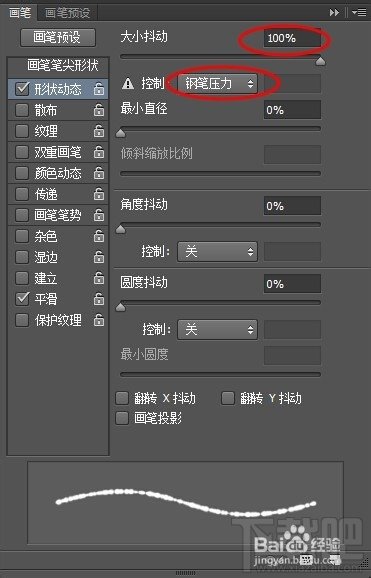
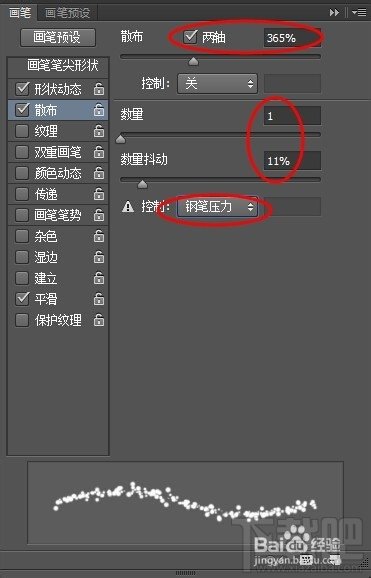
4、点击画笔工具,按F5键打开画笔属性,分别设置笔尖、形状动态、散布的属性值如图。
5、切换钢笔工具,右键点击路径再次执行描边路径。
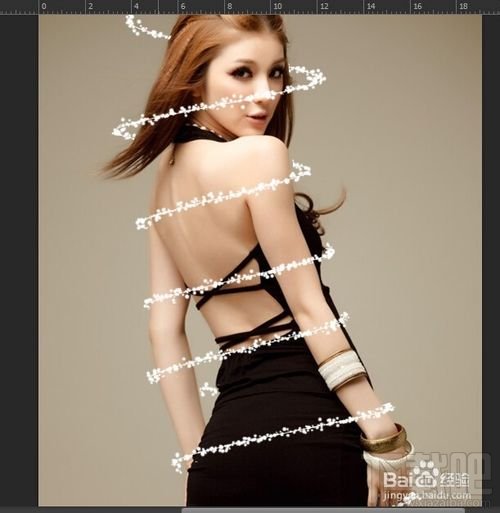
6、按Enter键隐藏路径,仔细查看光线线条,点击套索工具,将经过美女另一面的线条勾出,删除。
7、按Ctrl+D取消选区,可以看到光线旋转基本效果。
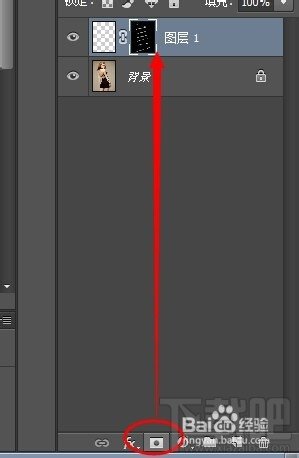
8、选中光线图层,按住Ctrl键,单击图层载入线条的选区,然后点击面板下方的按钮添加图层蒙版。
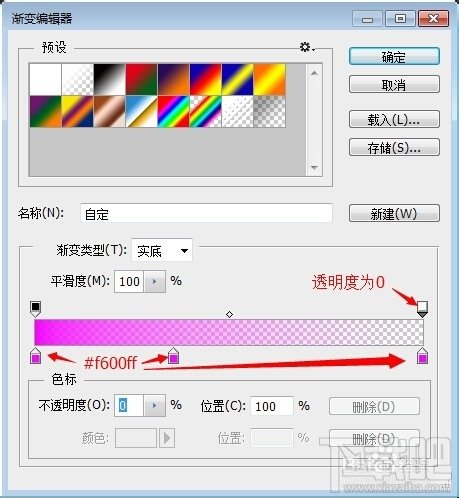
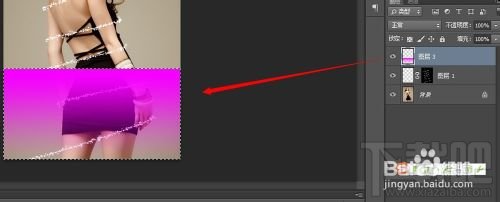
9、新建一个图层,用矩形选区工具在光线下方1/3出拉出矩形选区,并填充渐变色,设置的颜色将会决定光线的颜色。
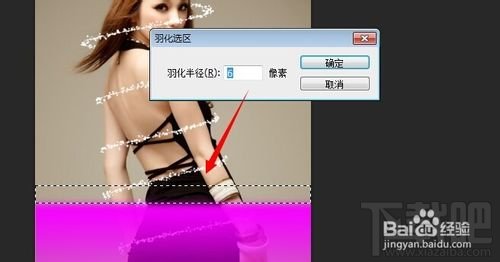
10、取消选区,框选矩形上边缘,按快捷键Shift+F6打开羽化窗口,设置值为6,点击确定。然后按Del键删除。这样矩形的边缘会自然些。
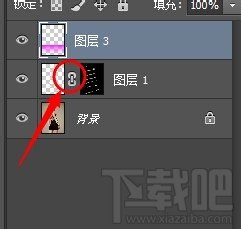
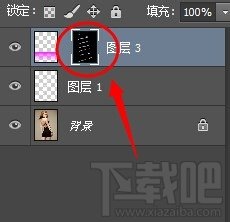
11、点击光线图层上的锁链图标,解除蒙版链接。然后将蒙版拖动到矩形图层,点击隐藏光线图层。
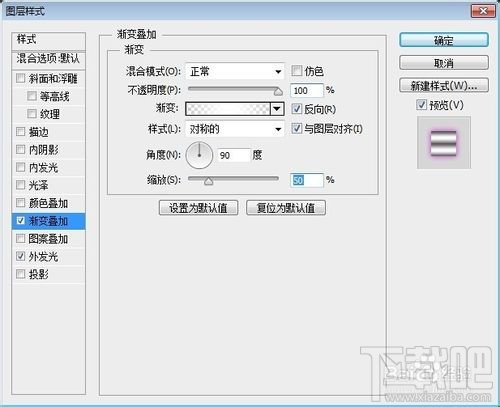
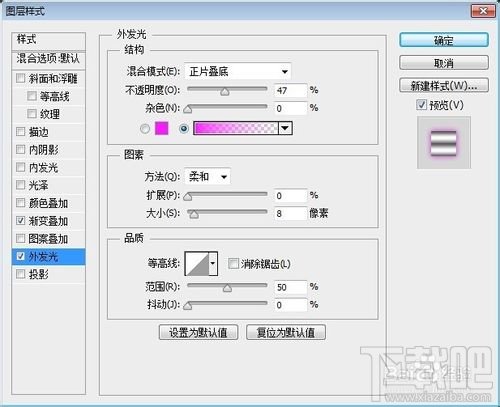
12、可以点击矩形渐变图层,增加一些图层样式,使渐变更美观。大家可以按照自己喜欢的风格定义参数。
13、点击【窗口】-【时间轴】,点击【创建帧动画】按钮,建立一帧。然后点击移动工具,保持渐变图层选中状态,按键盘向下箭头,使矩形渐变移出画布。
14、点击时间轴工具栏下方的【复制所选帧】按钮,建立第二帧。然后将渐变向上移动直到画布上方消失。
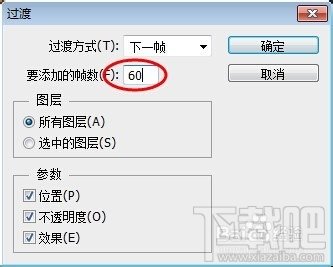
15、选中时间轴第一帧,点击【过渡】按钮,就是垃圾桶图标左边第二个。弹出过渡设置,输入数值40~70之间,这里输入60,确定。

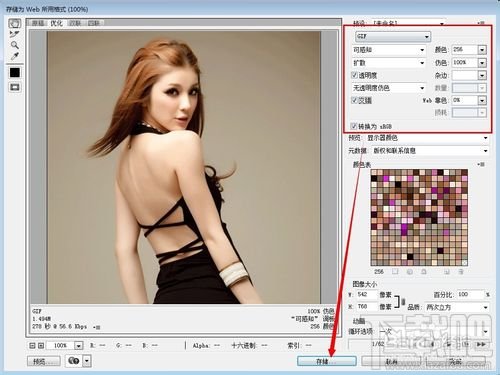
16、到这里就制作完成了,接下来最重要的就是保存动画了。点击文件-存储web所用格式,弹出设置框,点击勾选【透明度】,缩小动画大小,最后点击存储按钮完成动画。